

Legacy Manual
File Menu
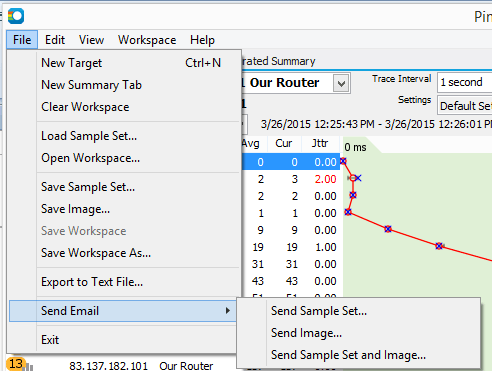
- New Target... - This will create a new empty target area where you can trace to a new instance. See the documentation on "Tracing to Multiple Targets" for more details.
- New Summary Tab - In PingPlotter Pro - this will create a new summary tab (we cover custom summary tabs in more detail here).
- Clear Workspace - In PingPlotter pro - this will clear out your current workspace
- Load Sample Set.. . - Loads a previously saved sample set. The default extension for PingPlotter saved sample files is .pp2, or PingPlotter save file format.
- Save Sample set... - Allows you to save the current sample set to an external file. These files are saved in .pp2, or PingPlotter's save file format.
- Save Image. . - Saves the current graph in .png, .gif or .bmp format. See the Autosave section for information on how to automate the saving of graph images.
- Save Workspace/Save Workspace As... - In PingPlotter Pro - this will save your current workspace (we cover workspaces in more detail here).
- Export to Text file.. . - Exports trace data to a comma delimited text file. Click here for an explanation of the export options available from PingPlotter..
- Send Email - This option will launch your email client and automatically create an email with the current sample set, image or both.
- Exit - Exits PingPlotter. By default you'll be prompted to save your current sample set if you haven't done so already (click here to see how to change this option).
**Some of the features listed in this topic are only available in PingPlotter Pro and/or PingPlotter Standard. See our product comparison page for more details**