

Version 5 Manual
Creating and Configuring Alerts
Alerts are automated events that trigger when specific network conditions occur.
For example, let's say you need to know when a destination you're monitoring stops responding. You can attach an alert within PingPlotter to that IP address so that you receive an email alert if the last 10 of 10 sample requests are lost.
Another possible alert condition could be set when latency exceeds a specific threshold. You could send an email alert, play a .WAV file (if you're usually within hearing distance) or both. If you're trying to show your ISP there's a problem, you might log your PingPlotter data to a file so you have a record of every time conditions deteriorate.
Setting up alerts
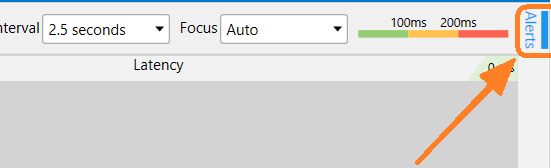
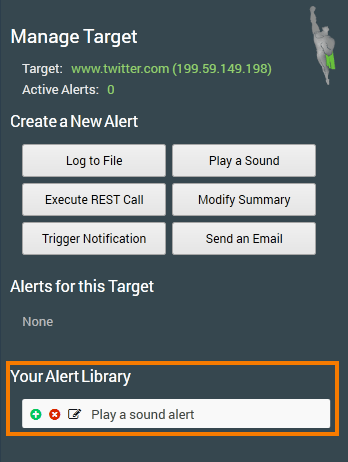
To set up a new alert, either select a target from a summary screen or open a trace window for a target, then click on the Alerts tab.
From here, we're able to create a new alert. Every alert will be stored in our alert library for use on any target.

For example, we'll be setting up an alert that will play a buzzer sound any time our target experiences latency higher than 250 milliseconds for 10% (or more) of a 10-minute timeframe.
First, we'll select an alert type . In our case, we will select Play a Sound from the Create a New Alert menu.

We will then be prompted to enter our alert conditions . For our example, we’ll select Latency or Packet Loss Over Time from the dropdown menu. We can then enter the various values for our condition.
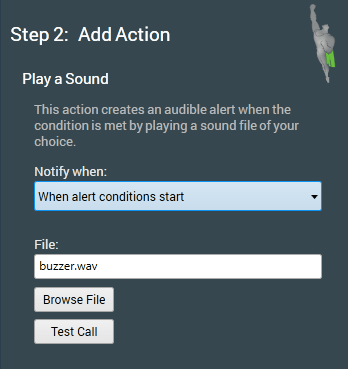
Once we've set our conditions, we will set the event notification preferences of our alert. If we'd like our sound to play when alert conditions start, we'll select When alert conditions start . We can then choose the sound file we'd like to play and test the alert.
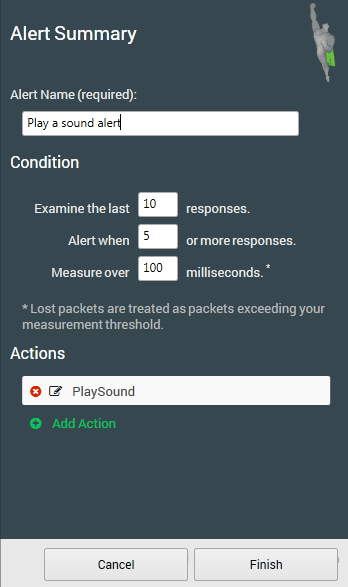
Once the alert is finished, we’ll be returned to an alert summary where we can see an overview of our newly-created alert. If we choose, we can Add Action to our alert to, say, add another sound to play when our alert condition ends.
If everything on the alert summary screen looks to be in order, we can give our alert a name and click Finish .
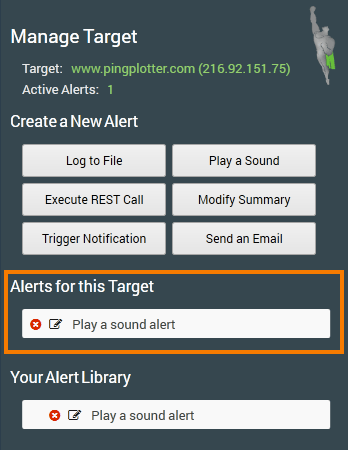
Once we've finished setting up our alert, we'll land back on the original alert screen. we will find our newly-created alert under the Alerts for this Target section. If we want to change anything about the alert (pick a different sound file, adjust the alert conditions, etc), we can click on the edit icon. We can also remove the alert from a target by clicking on the delete icon.
To apply our alert to another target, select the target, then open the Alerts tab. The alert will be under Your Alerts Library.
Note
Clicking on the delete icon in the Your Alert Library section will completely remove the alert from the program (as well as from any targets it happens to be associated with).