PingPlotter Cloud Manual
Individual Agent Deployment
Once logged in to PingPlotter Cloud, you can begin creating and deploying remote Agents to the different devices you wish to monitor and troubleshoot.
Why deploy an agent?
Agents are deployed to get to collect data from the perspective of the user that is experiencing the network issue. The Agent pings the different targets that you request it to perform a traceroute to. The results will help you diagnose any network issues.
Create an agent

- Navigate to the Agents page from the sidebar and select Create Agent .
- Pick a name for the Agent that you can easily recognize, e.g. John, Office 1, VoIP Server.
- Select Create.
Work at a helpdesk?
You can create a single link that you send out to each user that is having issues. When they open that link, an agent will be deployed. Check out Agent Templates and Presets to learn more.
Deploy an Agent
In this section, we will walk through how to deploy an Agent using two different methods: Agent Installer and Agent Auto Setup Link.

Agent Installer
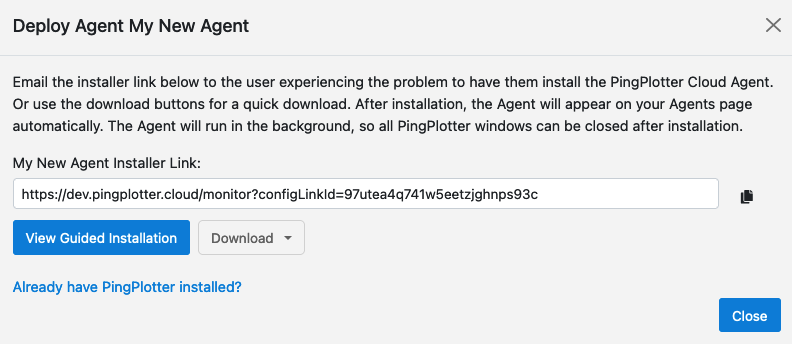
- Send the Installer link to the end user, or open it on the remote device yourself, and download the installer.
- For macOS: Run the application installer on the Agent device and follow the installation instructions. Once installed, you may quit the application — the Agent is now deployed.
- For Windows: On Windows devices, you may either run the installer normally, use an installation management system, or run a silent install from the Command Prompt.
- If using an installation management system, have it launch the .EXE installer quietly by using the following command:
- If using Command Prompt, open it with Administrator privileges, change the current directory to the location of the executable, and run the installer using the command above.
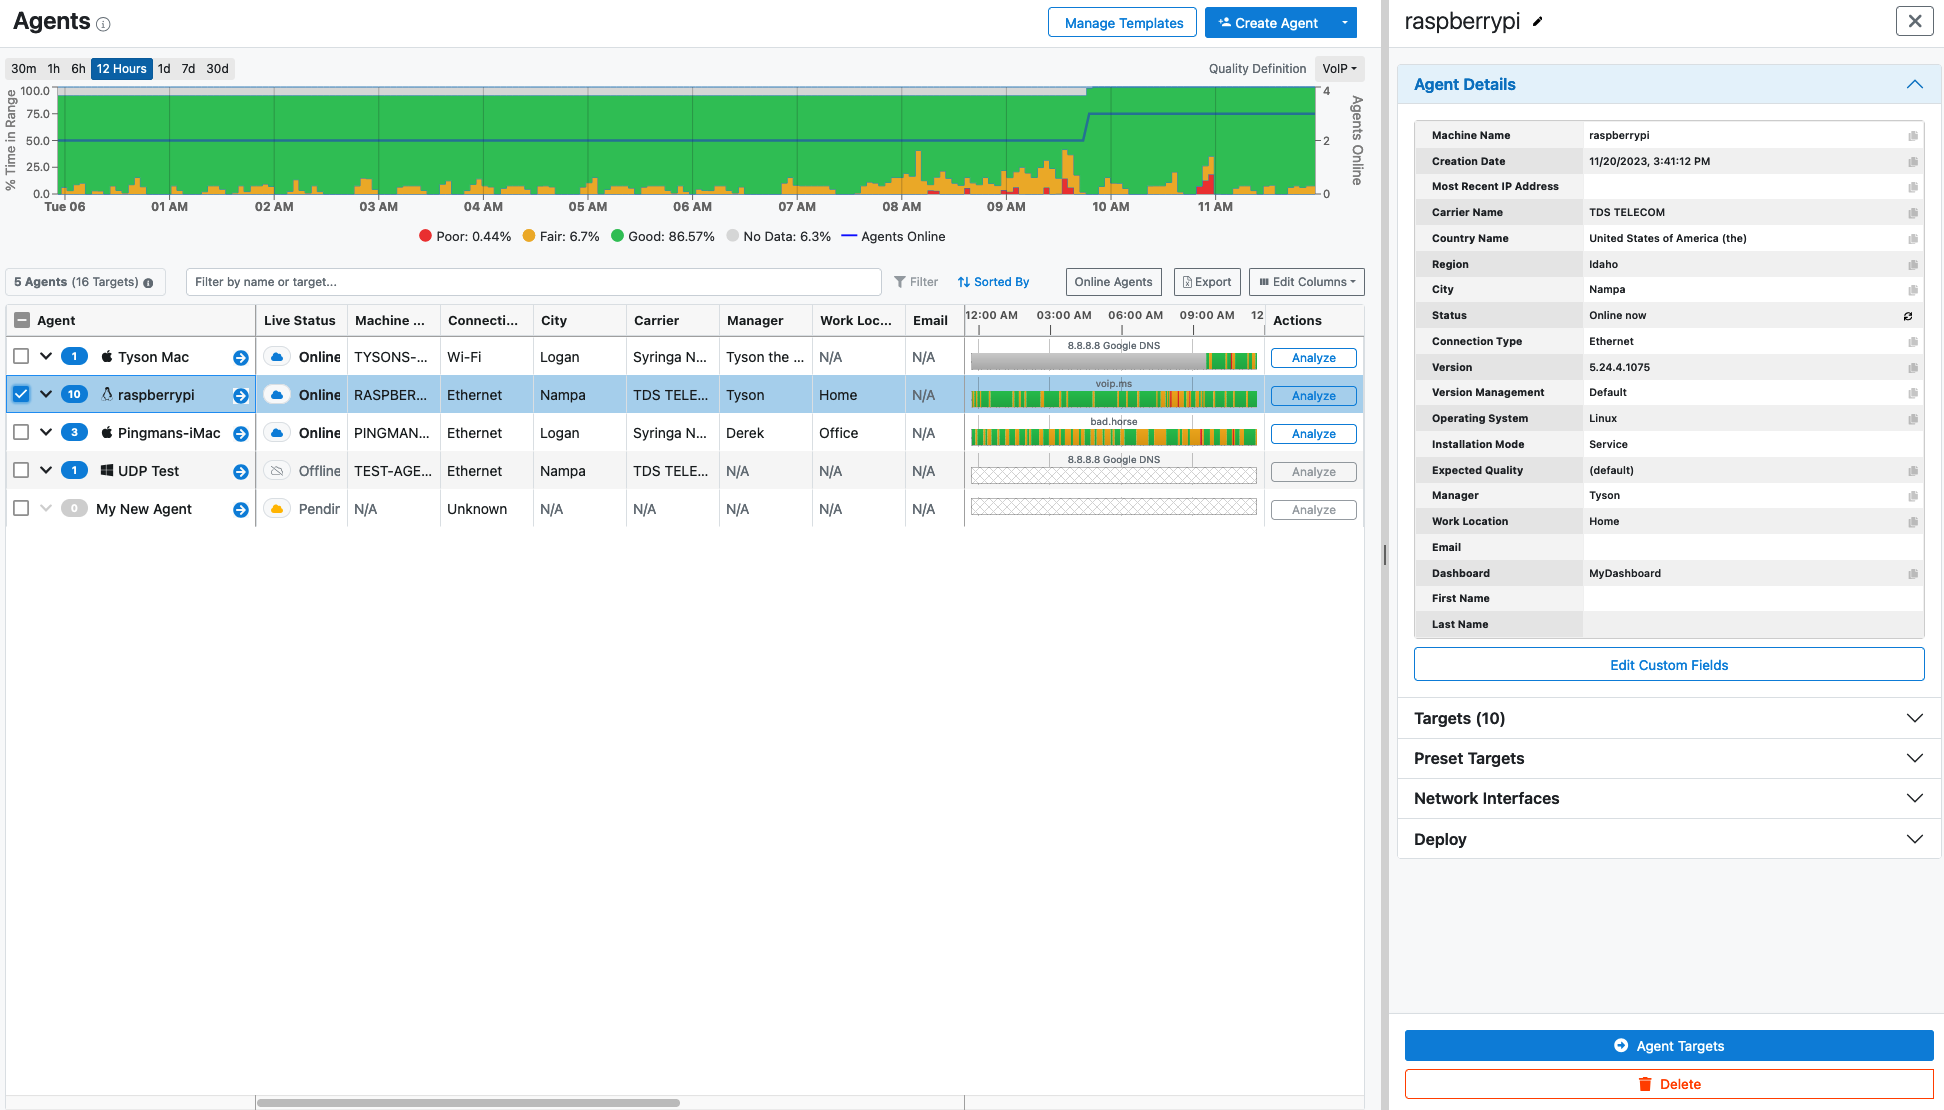
- You may need to refresh your browser after deployment is complete. Each Agent that has successfully connected will show a blue ONLINE status label and will have the Machine Name of the corresponding device.
Auto Setup Link
With this method, the machine already has PingPlotter installed.
- Select Already have PingPlotter installed? in the Deploy Agent step. Copy the Auto Setup link. It can also be found by selecting the Agent and clicking the Auto Setup button in the lower-right-corner.
- Paste this link into the web browser of the remote machine and hit Enter to activate it as a PingPlotter Cloud Agent.
- You may need to refresh your browser after deployment is complete. Each Agent that has successfully connected will show a blue ONLINE status label and will have the Machine Name of the corresponding device.
Edit an Agent

- Select the agent from the Agents table to open the sidebar and see its details.
- Rename the agent by clicking on the edit button next the agent's name.
- Remove and deactivate agents by clicking the Delete button. If the agent is online, you have the option to uninstall PingPlotter from the remote machine.
Important!
Deleting an Agent from PingPlotter Cloud means that you'll no longer be able to use the Installer or Auto-Setup link to activate new Agents and/or will no longer receive data from existing installations.

